What You'll Learn
Firebase/GCP Identity Platform integration
JWT authentication setup
Row-Level Security policies
Use Firebase or Google Cloud Identity Platform with Neon RLS to add secure, database-level authorization to your application.
This guide assumes you already have an application using Firebase or GCP Identity Platform for user authentication. It shows you how to integrate with Neon RLS, then provides sample Row-level Security (RLS) policies to help you model your own application schema.
How it works
Firebase and Google Cloud Identity Platform share the same underlying authentication infrastructure, but focus on different use cases: Firebase for mobile and web application developers, and GCP Identity Platform for enterprise-level identity management (leveraging Firebase in its implementation).
Both services generate JSON Web Tokens (JWTs) for user authentication, which are passed to Neon RLS. Unlike some other authentication providers that issue a dedicated JWKS URL per project, Firebase and GCP Identity Platform use a common JWKS URL and rely on the Project ID in the JWT's Audience claim to identify specific projects.
When you make a database request, Neon RLS validates these JWTs and uses the embedded user identity metadata to enforce Row-Level Security (RLS) policies in Postgres, securing database queries based on user identity. This flow is enabled by the pg_session_jwt extension.
Prerequisites
To follow along with this guide, you will need:
- A Neon account. Sign up at Neon if you don't have one.
- A Firebase or GCP Identity Platform project with Authentication enabled:
Integrate Firebase/GCP Identity Platform with Neon RLS
In this first set of steps, we'll integrate Firebase/GCP Identity Platform as an authorization provider in Neon. When these steps are complete, your authentication service (whether Firebase or GCP Identity Platform) will start passing JWTs to your Neon database, which you can then use to create policies.
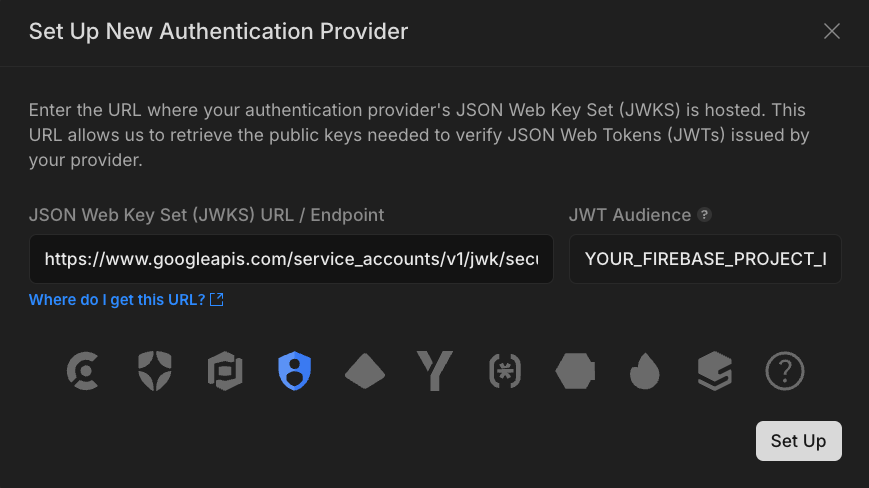
1. Get the JWKS URL and Project ID
You'll need two pieces of information:
-
JWKS URL - This is the same for all projects:
https://www.googleapis.com/service_accounts/v1/jwk/securetoken@system.gserviceaccount.com -
Project ID - This serves as your JWT Audience value:
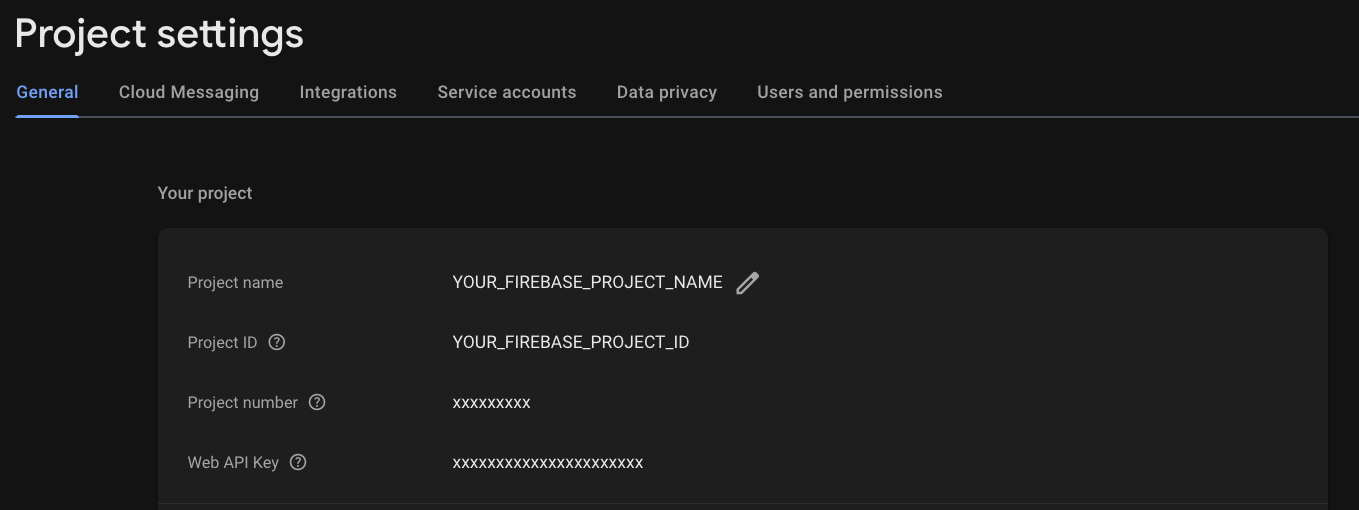
- Go to the Firebase Console
- Navigate to Settings > General > Project ID
Note
Every GCP Identity Platform project automatically creates a corresponding Firebase project, which is why we use the Firebase Console to get the Project ID.
2. Add Firebase/GCP Identity Platform as an authorization provider in the Neon Console
Once you have the JWKS URL, go to the Neon Console, navigate to Settings > RLS, and add Firebase/GCP Identity Platform as an authentication provider. Paste your copied URL and Firebase/GCP Identity Platform will be automatically recognized and selected.
At this point, you can use the Get Started setup steps from RLS in Neon to complete the setup — this guide is modeled on those steps. Or feel free to keep following along in this guide, where we'll give you a bit more context.
3. Install the pg_session_jwt extension in your database
Neon RLS uses the pg_session_jwt extension to handle authenticated sessions through JSON Web Tokens (JWTs). This extension allows secure transmission of authentication data from your application to Postgres, where you can enforce Row-Level Security (RLS) policies based on the user's identity.
To install the extension in the neondb database, run:
CREATE EXTENSION IF NOT EXISTS pg_session_jwt;4. Set up Postgres roles
The integration creates the authenticated and anonymous roles for you. Let's define table-level permissions for these roles. To allow both roles to read and write to tables in your public schema, run:
-- For existing tables
GRANT SELECT, UPDATE, INSERT, DELETE ON ALL TABLES
  IN SCHEMA public
  to authenticated;

GRANT SELECT, UPDATE, INSERT, DELETE ON ALL TABLES
  IN SCHEMA public
  to anonymous;

-- For future tables
ALTER DEFAULT PRIVILEGES
  IN SCHEMA public
  GRANT SELECT, UPDATE, INSERT, DELETE ON TABLES
  TO authenticated;

ALTER DEFAULT PRIVILEGES
  IN SCHEMA public
  GRANT SELECT, UPDATE, INSERT, DELETE ON TABLES
  TO anonymous;

-- Grant USAGE on "public" schema
GRANT USAGE ON SCHEMA public TO authenticated;
GRANT USAGE ON SCHEMA public TO anonymous;- Authenticated role: This role is intended for users who are logged in. Your application should send the authorization token when connecting using this role.
- Anonymous role: This role is intended for users who are not logged in. It should allow limited access, such as reading public content (e.g., blog posts) without authentication.
5. Install the Neon Serverless Driver
Neon’s Serverless Driver manages the connection between your application and the Neon Postgres database. For Neon RLS, you must use HTTP. While it is technically possible to access the HTTP API without using our driver, we recommend using the driver for best performance. The driver also supports WebSockets and TCP connections, so make sure you use the HTTP method when working with Neon RLS.
Install it using the following command:
npm install @neondatabase/serverlessTo learn more about the driver, see Neon Serverless Driver.
6. Set up environment variables
Here is an example of setting up administrative and authenticated database connections in your .env file. Copy the connection strings for both the neondb_owner and authenticated roles. You can find them by clicking Connect on the Neon Project Dashboard, or using the Neon CLI:
neon connection-string --role-name neondb_owner
neon connection-string --role-name authenticated
Add these to your .env file.
# Database owner connection string
DATABASE_URL='<DB_OWNER_CONNECTION_STRING>'

# Neon "authenticated" role connection string
DATABASE_AUTHENTICATED_URL='<AUTHENTICATED_CONNECTION_STRING>'
The DATABASE_URL is intended for admin tasks and can run any query while the DATABASE_AUTHENTICATED_URL should be used for connections from authorized users, where you pass the required authorization token. You can see an example in Run your first authorized query below.
Add RLS policies
Now that you’ve integrated Firebase with Neon RLS, you can securely pass JWTs to your Neon database. Let's start looking at how to add RLS policies to your schema and how you can execute authenticated queries from your application.
1. Add Row-Level Security policies
Here are examples of implementing RLS policies for a todos table – the Drizzle example leverages the simplified crudPolicy function, while the SQL example demonstrates the use of individual RLS policies.
import { InferSelectModel, sql } from 'drizzle-orm';
import { bigint, boolean, pgTable, text, timestamp } from 'drizzle-orm/pg-core';
import { authenticatedRole, authUid, crudPolicy } from 'drizzle-orm/neon';

// schema for TODOs table
export const todos = pgTable(
  'todos',
  {
    id: bigint('id', { mode: 'bigint' }).primaryKey().generatedByDefaultAsIdentity(),
    userId: text('user_id')
      .notNull()
      .default(sql`(auth.user_id())`),
    task: text('task').notNull(),
    isComplete: boolean('is_complete').notNull().default(false),
    insertedAt: timestamp('inserted_at', { withTimezone: true }).defaultNow().notNull(),
  },
  // Create RLS policy for the table
  (table) => [
    crudPolicy({
      role: authenticatedRole,
      read: authUid(table.userId),
      modify: authUid(table.userId),
    }),
  ]
);

export type Todo = InferSelectModel<typeof todos>;
The crudPolicy function simplifies policy creation by generating all necessary CRUD policies with a single declaration.
2. Run your first authorized query
With RLS policies in place, you can now query the database using JWTs from your authentication provider, restricting access based on the user's identity. Here's how to run authenticated queries from both the backend and the frontend of your application using authentication tokens. Highlighted lines in the code samples emphasize key actions related to authentication and querying.
'use server';

import { neon } from '@neondatabase/serverless';
import { getUserInfo } from '@/lib/auth'

export default async function TodoList() {
  const userInfo = await getUserInfo();
  if (!userInfo) {
    throw new Error('No user info available');
  }

  const sql = neon(process.env.DATABASE_AUTHENTICATED_URL!, {
    authToken: async () => {
      const jwt = userInfo.token;
      if (!jwt) {
        throw new Error('No JWT token available');
      }
      return jwt;
    },
  });

  // WHERE filter is optional because of RLS.
  // But we send it anyway for performance reasons.
  const todos = await
    sql('SELECT * FROM todos WHERE user_id = auth.user_id()');

  return (
    <ul>
      {todos.map((todo) => (
        <li key={todo.id}>{todo.task}</li>
      ))}
    </ul>
  );
}