
This guide will teach you how to build a serverless API using AWS Lambda, CDK (with TypeScript), and Neon. You will create a REST API with a single HTTP endpoint that returns a list of products from a Neon database.
You can find the complete code for this guide on GitHub.
Prerequisites
Assumed knowledge
This guide assumes basic knowledge of JavaScript/TypeScript as well as Node.js. Ideally, you already have an AWS account and some experience working with AWS. You also need to be familiar with configuring programmatic access to AWS resources. Check out authentication and access in the AWS documentation to learn more.
Development Environment
To follow along, you should have Node.js installed on your machine and have configured programmatic access to AWS resources.
Before diving in, here’s a quick overview of the different technologies you will use.
Technologies used
AWS Lambda
AWS Lambda (commonly referred to as Lambda) enables you to run code without provisioning or managing servers. Code only runs when needed and scales automatically to handle your workload, so you only pay for what you use.
AWS CDK
The AWS Cloud Development Kit (CDK) enables you to define your cloud infrastructure as code using familiar programming languages. Your CDK code is then compiled into CloudFormation templates, which provisions AWS resources.
CDK offers three building blocks:
- Construct: encapsulates everything AWS CloudFormation needs to create a cloud component. A Construct can represent a single AWS resource (e.g., AWS Lambda function) or be a higher-level abstraction consisting of multiple related AWS resources. CDK includes a collection of constructs called the AWS Construct Library, which contains constructs for every AWS service.
- Stacks: a unit of deployment. All AWS resources defined within the scope of a stack, either directly or indirectly, are provisioned as a single unit.
- Apps: container for one or more stacks and serves as each stack’s scope. Stacks within a single App can easily refer to each others’ resources.

CDK supports JavaScript, TypeScript, Python, Java, C#, and Go (in Developer Preview). In this guide, you’ll be using CDK v2 with TypeScript.
Neon
Neon is a fully managed serverless Postgres. This means you do not have to pick a size for your database upfront. Neon can automatically scale up compute resources based on your workload, and scale down to zero when not in use.
You can sign up for Neon and provision a Postgres instance for free.
Note: Neon’s architecture separates storage and compute. This makes a Neon Postgres instance stateless, making it possible to scale compute resources up or down automatically based on demand. To learn more, check out Neon’s architecture.
Get started with CDK
Install the CDK CLI
Run the following command to install the CDK CLI (also known as AWS CDK Toolkit ) as a global dependency on your machine:
npm install -g aws-cdkTo check that you installed the CLI correctly, run the following command:
cdk --versionThe output of this command is the version number of the AWS CDK. (e.g., 2.111.0 (build 2ccb59e)at the time of writing)
Set up a new CDK project using the CDK CLI
To get started, run the following command to create an empty directory and change into it:
mkdir serverless-api && cd serverless-apiNext, run the following command to create a new CDK project:
cdk init app --language=typescriptThis command will create a blank CDK project that uses TypeScript. It will also initialize a git repository and install the project’s dependencies.
Here’s an overview of the project structure and a breakdown of the most important files:
serverless-api/
┣ bin/
┃ ┗ serverless-api.ts
┣ lib/
┃ ┗ serverless-api-stack.ts
┣ test/
┃ ┗ serverless-api.test.ts
┣ .gitignore
┣ .npmignore
┣ README.md
┣ cdk.json
┣ jest.config.js
┣ package-lock.json
┣ package.json
┗ tsconfig.json
/bin/serverless-api.ts is the entry point of your CDK application.
#!/usr/bin/env node
import 'source-map-support/register';
import * as cdk from 'aws-cdk-lib';
import { ServerlessApiStack } from '../lib/serverless-api-stack';

const app = new cdk.App();

new ServerlessApiStack(app, 'ServerlessApiStack', {
  /* If you don't specify 'env', this stack will be environment-agnostic.
   * Account/Region-dependent features and context lookups will not work,
   * but a single synthesized template can be deployed anywhere. */

  /* Uncomment the next line to specialize this stack for the AWS Account
   * and Region that are implied by the current CLI configuration. */
  // env: { account: process.env.CDK_DEFAULT_ACCOUNT, region: process.env.CDK_DEFAULT_REGION },

  /* Uncomment the next line if you know exactly what Account and Region you
   * want to deploy the stack to. */
  // env: { account: '123456789012', region: 'us-east-1' },

  /* For more information, see https://docs.aws.amazon.com/cdk/latest/guide/environments.html */
});
You first create a new instance of the CDK App, which is the root construct for all CDK applications.
You then create a new instance of ServerlessApiStack, which you import from the lib directory.
The ServerlessApiStack instance takes the CDK app instance and a string identifier as parameters. The third parameter is an optional props object where we can specify environment-specific settings like the AWS account and region to deploy to. Here, it’s commented out, so this stack is environment-agnostic.
lib/serverless-api-stack.ts contains the definition for the application’s CDK stack.
import * as cdk from 'aws-cdk-lib';
import { Construct } from 'constructs';
// import * as sqs from 'aws-cdk-lib/aws-sqs';

export class ServerlessApiStack extends cdk.Stack {
  constructor(scope: Construct, id: string, props?: cdk.StackProps) {
    super(scope, id, props);

    // The code that defines your stack goes here

    // example resource
    // const queue = new sqs.Queue(this, 'ServerlessApiQueue', {
    //   visibilityTimeout: cdk.Duration.seconds(300)
    // });
  }
}
The ServerlessApiStack class is defined as an extension of the base cdk.Stack class, which represents a CloudFormation stack. The class has a constructor that takes three parameters: scope, id, and props.
– scope is of the Construct type and used to define the AWS CDK app this stack is a part of.
– id is a unique string identifier for the stack.
– props is an optional parameter and can be used to specify properties for the stack, like the AWS region or account.
The constructor then calls the parent (cdk.Stack) constructor using super(scope, id, props). The commented-out code within the constructor is an example of how you define an AWS resource (in this case, an SQS Queue) within the stack.
Finally, the cdk.json file in the root of your project tells the CDK CLI how to execute your app.
Define the Lambda function
To get started, create a new functions directory at the root of your project. Inside this directory, create a new file called list-products.ts. You can do this using your code editor or by running the following commands.
mkdir functions

touch ./functions/list-products.ts
The ./functions/get-products.ts file will contain your lambda function definition. Go ahead and add the following code to this file:
import { neon } from "@neondatabase/serverless";
import {
  SecretsManagerClient,
  GetSecretValueCommand,
} from "@aws-sdk/client-secrets-manager";

const getSecret = async (secretName: string): Promise<string | undefined> => {
  const secretsManager = new SecretsManagerClient();

  const command = new GetSecretValueCommand({
    SecretId: secretName,
  });

  const response = await secretsManager.send(command);

  if ("SecretString" in response) {
    return response.SecretString;
  }

  throw new Error("Secret not found");
};

const DATABASE_URL = await getSecret("DATABASE_URL");

const sql = neon(DATABASE_URL!);

export const handler = async (): Promise<any> => {
  try {
    const result = await sql("SELECT * FROM products");

    return {
      statusCode: 200,
      body: JSON.stringify({
        products: result,
      }),
    };
  } catch (error) {
    return {
      statusCode: 500,
      // @ts-ignore
      body: JSON.stringify({ error: error.message }),
    };
  }
};
The getSecret function is an async function that retrieves a secret value from AWS Secrets Manager. It takes a secretName as a parameter, sends a GetSecretValueCommand with this secretName to the Secrets Manager Client, and then waits for the response. If the response contains a SecretString, it returns it. If not, it throws an error message.
Next, you define the lambda handler. This is an async function that does the following:
- Retrieves the Neon
DATABASE_URLsecret from AWS Secrets Manager. - Establishes a connection to the database using the Neon serverless driver. It’s a low-latency Postgres driver for JavaScript/TypeScript that allows you to query data from serverless and edge environments over HTTP or WebSockets instead of TCP since direct access to TCP sockets is not always available.
- Returns the result as JSON or returns an error if it occurs.
The function leverages a top-level await so that the secret isn’t retrieved from Secrets manager on every request. You’ll notice that you have an error:
Top-level 'await' expressions are only allowed when the 'module' option
is set to 'es2022', 'esnext', 'system', 'node16', 'nodenext', or 'preserve',
 and the 'target' option is set to 'es2017' or higher.
To fix this error, you’ll need to modify your project’s tsconfig.json file:
// tsconfig.json

{
  "compilerOptions": {
    "target": "ES2020",
    "module": "commonjs",
    "lib": [
      "es2020",
      "dom"
    ],
    "declaration": true,
    "strict": true,
    "noImplicitAny": true,
    "strictNullChecks": true,
    "noImplicitThis": true,
    "alwaysStrict": true,
    "noUnusedLocals": false,
    "noUnusedParameters": false,
    "noImplicitReturns": true,
    "noFallthroughCasesInSwitch": false,
    "inlineSourceMap": true,
    "inlineSources": true,
    "experimentalDecorators": true,
    "strictPropertyInitialization": false,
    "typeRoots": [
      "./node_modules/@types"
    ]
  },
  "exclude": [
    "node_modules",
    "cdk.out"
  ]
}
Finally, you’ll need to add the driver to your project. Install it using the following command:
npm install @neondatabase/serverlessDefine your app stack
Navigate to ./lib/serverless-api-stack.ts and replace the default content with the following code to define the different AWS constructs you will use:
import * as cdk from "aws-cdk-lib";
import * as lambdaNodejs from "aws-cdk-lib/aws-lambda-nodejs";
import * as lambda from "aws-cdk-lib/aws-lambda";
import * as apigateway from "aws-cdk-lib/aws-apigateway";
import { Construct } from "constructs";
import * as iam from "aws-cdk-lib/aws-iam";

export class ServerlessApiStack extends cdk.Stack {
  constructor(scope: Construct, id: string, props?: cdk.StackProps) {
    super(scope, id, props);

    const listProductsFunction = new lambdaNodejs.NodejsFunction(
      this,
      "ListProductsFunction",
      {
        entry: "functions/list-products.ts",
        handler: "handler",
        runtime: lambda.Runtime.NODEJS_20_X,
        bundling: {
          format: lambdaNodejs.OutputFormat.ESM,
          target: "node20",
          nodeModules: [
            "@neondatabase/serverless",
            "@aws-sdk/client-secrets-manager",
          ],
        },
      }
    );

    listProductsFunction.addToRolePolicy(
      new iam.PolicyStatement({
        effect: iam.Effect.ALLOW,
        actions: ["secretsmanager:GetSecretValue"],
        resources: ["*"],
      })
    );

    const productServiceApi = new apigateway.RestApi(this, "Endpoint", {
      restApiName: "Product Service",
      defaultCorsPreflightOptions: {
        allowOrigins: apigateway.Cors.ALL_ORIGINS,
        allowMethods: apigateway.Cors.ALL_METHODS,
      },
    });

    const products = productServiceApi.root.addResource("products");

    products.addMethod(
      "GET",
      new apigateway.LambdaIntegration(listProductsFunction)
    );
  }
}
First, you define a Lambda function called ListProductsFunction using the NodejsFunction class from the lambdaNodejs module. This function’s entry point is the ./functions/list-products.ts file, and its handler (named handler) uses Node.js 20 as the runtime. The Lambda function is permitted to get secret values from AWS Secrets Manager (this is where the database connection string and credentials will be stored). This is done by adding a new policy to the function’s role that allows the secretsmanager:GetSecretValue action on all resources.
Next, you define an API Gateway by creating a new instance of the RestApi class from the apigateway module. This RestApi instance has a unique identifier called "Endpoint" and is called “Product Service”. You then set the API’s CORS (Cross-Origin Resource Sharing) policy to allow all origins and methods. In a production setting, it’s more secure only to allow specific origins.
Finally, you add a new resource named “products” to the root of the REST API, which represents a specific endpoint in your REST API. You then add a new GET method to the “products” resource. This method is integrated with the ListProductsFunction Lambda function using the LambdaIntegration class from the apigateway module. This ensures that when a GET request is made to the products endpoint of the Product Service API, the ListProductsFunction Lambda function will be invoked.
Now that you have set up your app stack, the next step is to create a Neon Postgres database and store its connecting string in AWS Secrets Manager.
Getting started with Neon
Create a Neon project
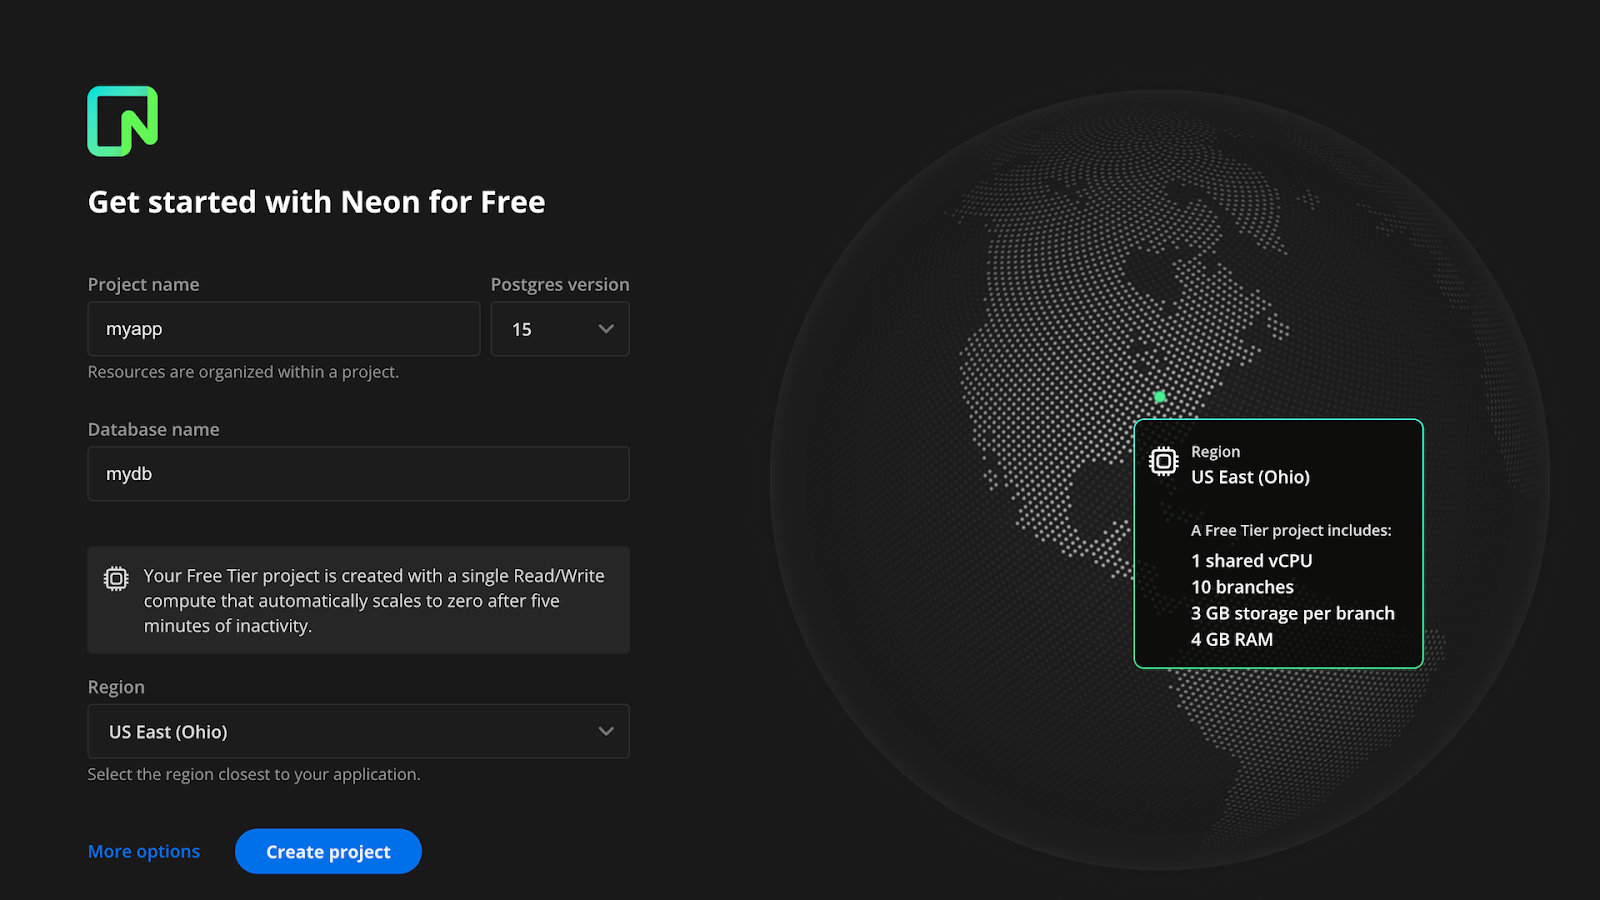
After signing up, you are directed to the Neon Console to create your first project. Enter a name for your project, select a Postgres version, provide a database name, and select a region. Generally, you’ll want to select the region closest to your application. When you’re finished, click “Create project”.
You are presented with the connection details for your new project, which you can use to connect to your database from a client or application. You can save the connection details or retrieve them later from the Connection details widget on the Neon Dashboard.

Add data using Neon’s SQL editor
In the Neon console, go to the SQL editor and run the following SQL query, which creates a new table called products and inserts 10 records.
CREATE TABLE products (
  id SERIAL PRIMARY KEY,
  name VARCHAR(255),
  price NUMERIC(10,2),
  category VARCHAR(50)
);

INSERT INTO products (name, price, category) VALUES ('Product 1', 10.99, 'Category 1');
INSERT INTO products (name, price, category) VALUES ('Product 2', 19.99, 'Category 1');
INSERT INTO products (name, price, category) VALUES ('Product 3', 5.99, 'Category 2');
INSERT INTO products (name, price, category) VALUES ('Product 4', 14.50, 'Category 3');
INSERT INTO products (name, price, category) VALUES ('Product 5', 9.99, 'Category 2');
INSERT INTO products (name, price, category) VALUES ('Product 6', 25.99, 'Category 3');
INSERT INTO products (name, price, category) VALUES ('Product 7', 12.75, 'Category 1');
INSERT INTO products (name, price, category) VALUES ('Product 8', 8.49, 'Category 2');
INSERT INTO products (name, price, category) VALUES ('Product 9', 6.99, 'Category 3');
INSERT INTO products (name, price, category) VALUES ('Product 10', 14.99, 'Category 1');
Now that the Neon database is ready and includes some data, it’s time to store its connection string information securely.
Storing the connection string in AWS Secrets Manager
To store secrets using AWS Secrets Manager, you can use the AWS console. Alternatively, you can use the AWS CLI by running the following command:
aws secretsmanager create-secret --name DATABASE_URL --secret-string "<connection_string>"This command will create a new secret named DATABASE_URL with a value of the connection string you specify.
The final step is deploying your project.
Deploy your project
Before CDK can deploy projects for you in your AWS account, you need to provision some resources for it. You can do so by running the following command:
cdk bootstrapAfter running this command, you should see an output similar to the following:
cdk bootstrap
 ⏳  Bootstrapping environment aws://715061189737/us-east-1...
Trusted accounts for deployment: (none)
Trusted accounts for lookup: (none)
Using default execution policy of 'arn:aws:iam::aws:policy/AdministratorAccess'. Pass '--cloudformation-execution-policies' to customize.
CDKToolkit: creating CloudFormation changeset...
 ✅  Environment aws://715061189737/us-east-1 bootstrapped.
You can then run the following command to deploy your app:
cdk deploy
After a couple of minutes, you should see output similar to the following:
cdk deploy
Bundling asset ServerlessApiStack/ListProductsFunction/Code/Stage...

  cdk.out/bundling-temp-5514c55cb48e033141e23f037a5344879b64bfeb4ffea1bb9218896f8dc309a3/index.js  214.4kb

⚡ Done in 10ms

✨  Synthesis time: 1.89s

ServerlessApiStack:  start: Building cd990a12dbe059951e4c75638eebaccadbef7005e02fd96b07ad53ba19ec5cf7:current_account-current_region
ServerlessApiStack:  success: Built cd990a12dbe059951e4c75638eebaccadbef7005e02fd96b07ad53ba19ec5cf7:current_account-current_region
ServerlessApiStack:  start: Building 09f72adc0b5eb5d09ea17e1d7b73542668d4e75c80749c079a28bcd292930c5d:current_account-current_region
ServerlessApiStack:  success: Built 09f72adc0b5eb5d09ea17e1d7b73542668d4e75c80749c079a28bcd292930c5d:current_account-current_region
ServerlessApiStack:  start: Publishing cd990a12dbe059951e4c75638eebaccadbef7005e02fd96b07ad53ba19ec5cf7:current_account-current_region
ServerlessApiStack:  start: Publishing 09f72adc0b5eb5d09ea17e1d7b73542668d4e75c80749c079a28bcd292930c5d:current_account-current_region
ServerlessApiStack:  success: Published 09f72adc0b5eb5d09ea17e1d7b73542668d4e75c80749c079a28bcd292930c5d:current_account-current_region
ServerlessApiStack:  success: Published cd990a12dbe059951e4c75638eebaccadbef7005e02fd96b07ad53ba19ec5cf7:current_account-current_region
ServerlessApiStack: deploying... [1/1]
ServerlessApiStack: creating CloudFormation changeset...

 ✅  ServerlessApiStack

✨  Deployment time: 30.67s

Outputs:
ServerlessApiStack.Endpoint8024A810 = https://1nuo97du84.execute-api.us-east-1.amazonaws.com/prod/
Stack ARN:
arn:aws:cloudformation:us-east-1:715061189737:stack/ServerlessApiStack/fd406b30-8ebb-11ee-95d5-0a9d140687c9

✨  Total time: 32.56s
You can now go to /products at the output URL (e.g., https://1nuo97du84.execute-api.us-east-1.amazonaws.com/prod/products) and get a JSON response object with data fetched from your database.

Clean up
To avoid unexpected AWS charges, you can destroy your AWS CDK stack by running the following command:
cdk destroySummary & final thoughts
In this guide, you learned about AWS Lambda, CDK, and Neon and how to use them to build and deploy a serverless API.
References:


